We research products independently. When you buy through links on this page, we may earn a commission from Amazon at no extra cost to you. As an Amazon Associate we earn from qualifying purchases. Read our affiliate disclosure.
To use a FoodSaver vacuum sealer, make or pick a FoodSaver bag, fill it leaving about 3 in. of empty space at the top, place the open end in the machine's vacuum channel, and press Vacuum and Seal (automatic models start on their own). The machine pulls the air out and heat-seals the bag. The rest is technique: dry bag mouths, the right setting for moist food, and the handheld or accessory port for zipper bags, containers and jars.
FoodSaver makes many models, from the upright PowerVac to the V4400 2-in-1, and the buttons differ. This guide covers the steps that apply to all of them, then the model-specific bits. Check your manual for exact button names.
The parts of a FoodSaver
| Part | What it does | Found on | Amazon |
|---|---|---|---|
| Vacuum channel | Where the open end of the bag goes; air is pulled out here | All countertop models | |
| Sealing strip | Heated bar that fuses the bag shut | All countertop models | |
| Gaskets | Foam seals that hold vacuum around the channel | All countertop models | See options |
| Drip tray | Catches liquid drawn out of the bag | V4400 and other premium models (removable, dishwasher safe on the V4400) | |
| Roll storage and cutter | Holds a roll and cuts custom bags | FM2100, V4400 | |
| Accessory port and hose | Vacuums containers, jar sealers and zipper bags | FM2100 and others | See options |
| Built-in handheld | Pull-out handheld for zipper bags and containers | V4400 2-in-1 | |
| Moist setting or detection | Extra heat for damp bag mouths | Most current models; automatic on the V4400 |
How to use a FoodSaver vacuum sealer with a roll
Rolls are the cheapest way to use a FoodSaver because you only use the length you need. FoodSaver rolls come in 8 in. and 11 in. widths.
- Pull out enough roll for the food plus about 3 in. extra, and cut it with the built-in cutter or clean scissors. Cut straight; a slanted edge often leaks.
- Seal one end. Lay the cut end across the sealing strip, close the lid and press Seal only. This makes the bottom of the bag.
- Fill the bag. Fold the top 2 in. outward like a cuff while you fill, so meat juice and crumbs stay off the seal area. Unfold when done.
- Leave headspace. Keep at least 3 in. between the food and the bag opening.
- Insert the open end into the vacuum channel (or drip tray area), flat and without wrinkles.
- Choose the setting. Dry for most food; Moist for marinated meat or anything that left damp traces near the opening.
- Press Vacuum and Seal. On automatic models like the V4400, the machine senses the bag and starts by itself.
- Check the seal. You want a clear, even band across the bag. If you see wrinkles, gaps or a milky patch, cut above it and reseal.
A tip from FoodSaver's own bag design: pre-cut FoodSaver bags have align-to-seal and tear-to-open features, so with those you skip the first two steps.
How to use a FoodSaver with pre-cut bags
Pre-cut bags skip the cutting step. Fill the bag, leave headspace, insert the open end and press Vacuum and Seal. Quarts suit single portions and gallons suit roasts or family packs. Our FoodSaver vacuum bags guide explains which pre-cut, roll and zipper bags go with which machine.
How to seal moist food and marinades
External sealers like FoodSaver pull air out through the bag opening, and liquid follows the air. The fix is to slow it down:
- Chill or partly freeze juicy cuts and marinated meat for an hour or two first.
- Use the Moist setting if your model has one. The V4400 switches automatically.
- Leave extra headspace, 4 in. or more for marinades.
- Stop early if your model allows it, by pressing Seal as soon as liquid creeps toward the strip.
- Empty the drip tray after any wet session.
For soups, stocks and sauces, freeze them flat in a container or bag first and seal the frozen block. Our guide to vacuum sealing liquids covers this in detail.
How to use the FoodSaver handheld and zipper bags
FoodSaver's vacuum zipper bags have a valve instead of a heat seal. You close the zipper, place the handheld on the valve and vacuum until the bag is snug. They are reusable and good for cheese, deli meat and leftovers you will open often.
- V4400 2-in-1: pull the built-in handheld out of the machine and press it onto the valve.
- FoodSaver Handheld+ 2-in-1 or Mini: these standalone handhelds work the same way.
- Machines with an accessory port: connect the hose to a FoodSaver handheld sealer attachment or zipper bag adapter.
Zipper bags rely on a valve and zipper rather than a fused seal, so for long freezer storage, heat-seal bags are the better choice.
How to use the FoodSaver accessory port
The accessory port turns your sealer into a pump for containers and jars:
- Connect the hose to the port on the machine.
- Attach the other end to the container lid, jar sealer or bottle stopper.
- Press the accessory or vacuum button your model uses for accessories.
- Wait for the motor to stop, then remove the hose. On containers, check that the lid knob or valve is set to seal.
FoodSaver's Preserve & Marinate containers also have a marinate mode for quick marinating when connected to a FoodSaver handheld or the V4400's built-in handheld.
How to vacuum seal mason jars with a FoodSaver
You need a FoodSaver jar sealer (regular or wide-mouth) and an accessory hose or handheld.
- Fill the jar with dry food, leaving about 1 in. of headspace.
- Wipe the rim clean and place a flat canning lid on top (no ring).
- Press the jar sealer over the lid and connect the hose.
- Vacuum until the motor stops, then lift the sealer off. The lid should be pulled down tight.
This is for dry pantry food or fridge storage only. It is not canning, and it does not make perishable food shelf-stable. Our mason jar vacuum sealing guide explains the limits.
Model-specific tips
| Model | What is different | Amazon |
|---|---|---|
| FoodSaver V4400 2-in-1 | Automatic bag and moisture detection; insert the bag straight and far enough for the sensor. Built-in handheld for zipper bags. Removable dishwasher-safe drip tray. | Check price |
| FoodSaver FM2100 | One-touch sealing, dual heat-sealing strips, roll storage and cutter; accessory port and hose for containers and jars. | Check price |
| FoodSaver PowerVac VS0150 | Stores upright; Dry and Moist settings and an alignment tray for placing the bag. No listed roll storage or cutter. | Check price |
| FoodSaver Handheld+ 2-in-1 | Handheld vacuum for zipper bags and containers, plus a heat-seal base. | Check price |
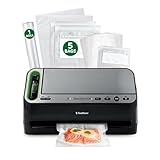

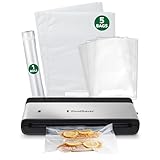

Our FoodSaver V4400 review goes through the automatic model's behavior in more detail.
Storage times do not change
A FoodSaver keeps air off your food, which slows freezer burn and staling. It does not change the safety rules. Clemson Cooperative Extension (HGIC 3865) says perishable vacuum-packaged food must be kept in the refrigerator between 34 and 40 °F or in the freezer at 0 °F or below, and that vacuum packaging is not a substitute for safely processing food meant for room-temperature storage. USDA FSIS says food kept constantly at 0 °F stays safe indefinitely; freezer times are about quality. When you thaw sealed meat or fish, open the bag and thaw it in the refrigerator, as extension services advise. Our vacuum-sealed meat storage chart gives times by cut.
Common mistakes
- Overfilling the bag. Less than 3 in. of headspace means the bag mouth will not sit flat in the channel.
- Wet or greasy bag mouth. The number-one cause of seals that open later.
- Pressing Vacuum and Seal to make the bottom of a roll bag. Use Seal only.
- Sealing sharp bones unprotected. Fold a paper towel over T-bones, ribs and crab legs to prevent punctures.
- Back-to-back sealing with no rest. The strip overheats and can melt through bags; let it cool.
- Storing the lid latched. Leaving it closed compresses the gaskets over time.
- Ignoring the drip tray. Dried juice on the gaskets weakens vacuum. If your FoodSaver stops pulling a full vacuum, our FoodSaver troubleshooting guide walks through the fixes.
FAQ
How do you use a FoodSaver vacuum sealer for the first time?
Plug it in, make a bag from the included roll (seal one end, fill, leave about 3 in. of headspace), place the open end in the vacuum channel or drip tray area, close or press the lid according to your model, and press Vacuum and Seal. Automatic models such as the V4400 start on their own when they detect the bag.
How do you seal the bottom of a FoodSaver roll?
Cut a length of roll about 3 in. longer than the food, place one cut end across the sealing strip, close the lid and press Seal only (not Vacuum and Seal). That end becomes the bottom of the bag. Then fill the bag and vacuum seal the open end.
How do you use the FoodSaver accessory port?
Connect the accessory hose to the port on the machine and to the valve on a FoodSaver container, jar sealer or zipper bag adapter, then press the vacuum or accessory button. Models with a built-in handheld, such as the V4400 2-in-1, use the handheld instead of a hose.
Can you use a FoodSaver on wet food?
Yes, with care. Use the Moist setting if your model has one (the V4400 detects moisture automatically), chill or partly freeze juicy food first, and leave extra headspace. For soups and stocks, freeze them flat first and seal the frozen block.
Why is my FoodSaver not vacuuming all the way?
Common causes are a bag not seated in the vacuum channel, a wrinkle or moisture at the seal, a tiny hole in the bag, or flattened or dirty gaskets. Reseat the bag, wipe the bag mouth and gaskets, and try a fresh bag.